Moody LUT Pack Collection
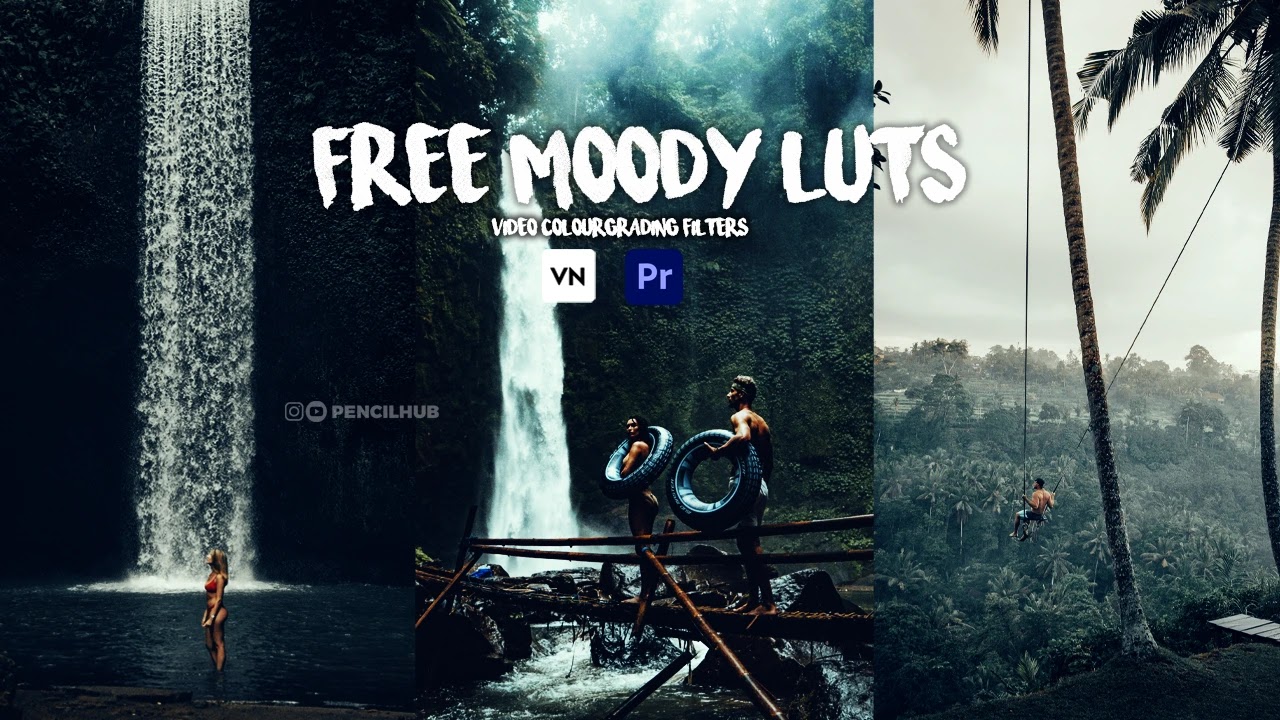
Introducing our "Moody Tone LUT Pack": a collection of meticulously crafted Look-Up Tables (LUTs) designed to transform your videos and photos into captivating, moody masterpieces. LUTs are powerful tools used by professionals to enhance the colour grading and overall visual aesthetic of their visual content. Our Moody Tone LUT Pack offers a wide range of presets that will add depth, drama, and emotion to your footage, allowing you to create a unique visual identity and compellingly tell your story.
With our Moody Tone LUT Pack, achieving the desired mood for your videos or photos has never been easier. Whether you want to evoke a sense of mystery, amplify the intensity of a scene, or create a nostalgic atmosphere, our LUTs are carefully tuned to bring out the perfect balance of contrast, saturation, and colour grading to achieve that moody look. Each LUT in the pack has been meticulously crafted and tested to ensure consistent and stunning results across various lighting conditions and camera profiles.
Our Moody Tone LUT Pack is perfect for filmmakers, video editors, content creators, and photographers who want to elevate their visuals and impact their audience. By applying these LUTs to your footage, you can transform ordinary moments into extraordinary ones, adding a touch of sophistication and cinematic flair.
Preview of lut pack
How to create our own Lut Filter
we'll guide you on creating your very own LUT filter using Adobe Premiere Pro. LUTs (Look-Up Tables) are powerful tools that allow you to enhance the colour grading and overall visual aesthetic of your videos. By creating your own LUT filter, you can achieve a unique and personalized look for your footage. Let's dive into the step-by-step process:
Step 1: Import Footage
Start by launching Adobe Premiere Pro and importing the footage you want to create a LUT for. This could be a single clip or a sequence of clips.
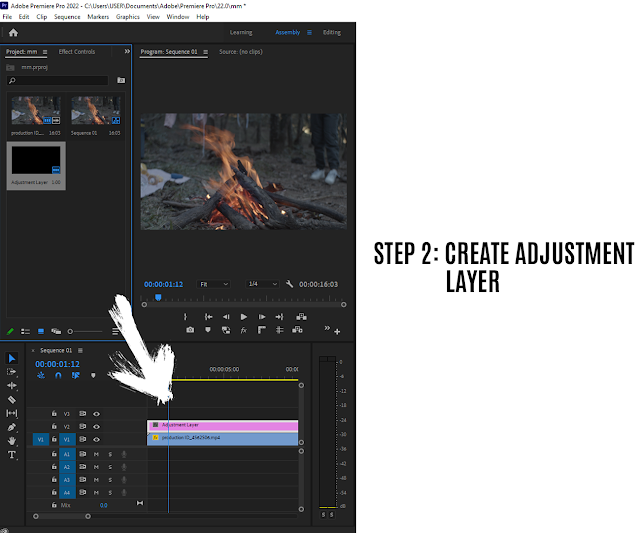
Step 2: Create Adjustment Layer
To ensure consistency across all your clips, create an adjustment layer. Right-click in the Project panel, choose "New Item," and select "Adjustment Layer." Drag the adjustment layer to the timeline above your footage.
Step 3: Color Grade and Adjust
Using the built-in colour grading tools in Adobe Premiere Pro, adjust the exposure, contrast, saturation, and other parameters to achieve the desired look for your footage. Experiment with different adjustments until you're satisfied with the overall visual appearance.
Step 4: Export as a LUT
Once you've achieved your desired look, it's time to export your colour grading adjustments as a LUT. Click on three lines in Lumetric colour tap then click on "Export as .cube" select the file location and click on ok.
By following these steps, you can create your own LUT filters using Adobe Premiere Pro. Get creative, experiment with different colour grading techniques, and develop your signature style. With custom LUT filters, you'll be able to add a professional touch to your videos and make them truly stand out. Happy editing!
How to colour grade video using Lut filter
The process of using LUT filters in mobile video editors and Adobe Premiere Pro is quite similar, enabling you to achieve stunning colour-grading effects. Here's a concise guide on how to utilize LUT filters on these platforms:
For Mobile Video Editors (VN - Video Editor):
- Begin by installing the VN - Video Editor app from your mobile app store and launching it.
- Import your desired video footage into the app's timeline by tapping either the "+" or "Import" button.
- Within the app's editing tools, locate the "Filters" or "Effects" section.
- Look for the LUT filter option and tap on it to access the available LUT filters.
- Browse through the collection of LUTs and select the one that aligns with your desired look.
- If desired, fine-tune the intensity or strength of the LUT filter.
- Evaluate the result by previewing the video with the applied LUT filter.
- Once satisfied with the outcome, export or save the edited video, ensuring that the LUT filter is applied.
These steps should enable you to effectively utilize LUT filters in VN - Video Editor. Now, let's explore the process for using LUT filters in Adobe Premiere Pro.
CapCut-video editor
To utilize LUT filters in the CapCut video editor app, follow these steps:
- Install the CapCut app from your mobile app store and launch it.
- Initiate a new project or access an existing project containing the desired video footage for editing.
- Incorporate your video footage into the timeline by selecting the "+" button or opting for the "Import" function.
- Single-tap on the video clip within the timeline to highlight it.
- Locate the editing tools and search for the " Effects " tab or icon."
- Within the Effects section, find the option titled "LUT" or "Color Grading" and tap on it to gain access to the LUT filters.
- Browse through the available LUT filters and choose the one that best aligns with your desired visual style.
- Assess the result by previewing the video with the applied LUT filter.
- If desired, adjust the intensity or strength of the LUT filter using the provided controls or sliders.
- Additionally, you can fine-tune other colour gradings settings, such as brightness, contrast, saturation, or temperature, to further enhance the visual impact.
- Once satisfied with the edits, preview the final result to ensure it meets your expectations.
- Export or save the edited video with the LUT filter applied using the appropriate export settings.
Please bear in mind that the precise steps and interface of the CapCut app might exhibit slight variations based on the version you are utilizing. Nonetheless, these general guidelines will assist you in navigating through the process of applying LUT filters to your video footage in the CapCut video editor. Enjoy your exploration of different LUT filters and the creation of visually captivating videos with enhanced colour-grading effects.
To download the LUT filter, follow these steps:
- Go to the webpage or platform where the LUT filter is available for download.
- Locate the password for the file. The password is usually provided above or near the password entry field.
- Enter the password in the designated field to unlock the file and gain access to the download.
- Click on the download option to initiate the download process.
- You may be redirected to Google Drive for the download.
- If you are using an iPhone, click on the three lines icon and select the "open in" option. Then, choose the "save to file" option and select the desired location for saving the file.
- If you are using an Android device, simply click on the download button, and the LUT file will be downloaded to your device in the default download location.
- Once downloaded, you will receive a zip file containing the LUT filter.
- Click on the zip file to extract its contents. If you encounter any issues extracting the file, you can use applications like "Zarchiver" or "Winrar" to assist in extracting the contents.
- After extracting the file, you will find a folder containing the LUT filter file.
- Open the folder to access the LUT filter, which can be used for video colour grading or photo editing purposes.
By following these steps, you can easily download and access LUT filters, allowing you to enhance your videos or photos with captivating colour-grading effects.
Password Protected Download
Download


.webp)

0 Comments